Thursday, December 29, 2011

Homemade Hostess Treats


Cousins fan Cheryl Dillon was kind enough to share the recipes (and where she found them) for the homemade Hostess Cupcakes, Snowballs and Twinkies she made during the holidays. Ahhh...such memories! Just looking at these recipes and photos makes me want to go outside and pogo stick. (OK, maybe not. Besides, I turned in my pogo stick a long time ago.) But if any of you out there are as daring as Cheryl and give these tasty childhood treats a try, let us know how it went and send us some of your own photos! (Or if any of you still hop on your pogo stick, send those photos in, too!) —Diana 


Cupcakes
Cakes:
1 cup plus 4 tablespoons flour
5 tablespoons cocoa powder
1 1/2 teaspoons baking soda
1/2 teaspoon salt
1 cup granulated sugar
1 cup water
6 tablespoons vegetable oil
3 teaspoons distilled white vinegar
2 teaspoons vanilla extract

Filling:
1/2 cup sugar, divided
1/4 cup cornstarch
4 egg yolks
2 cups milk, divided
1/2 teaspoon vanilla extract

Glaze:
6 ounces finely chopped bittersweet chocolate
6 tablespoons boiling water

Icing:
2 tablespoons egg white, at room temperature
1/8 teaspoon cream of tartar
1 cup plus 4 to 6 tablespoons confectioners' sugar

Cupcakes: Position a rack in the center and preheat oven to 325 degrees F. Lightly butter 18 muffin cups

Into a medium bowl, sift together the flour, cocoa, baking soda and salt. Mix in the sugar. Make a well in the center. Whisk in the water, oil, vinegar and vanilla extract. Blend until smooth. (The batter will be very thin.) Spoon the batter into the prepared cups. Bake until a wooden pick inserted into the center of one of the cupcakes comes out clean, about 15 to 18 minutes. Cool the cupcakes in the pans on a wire rack for 5 minutes. Remove the cupcakes from the pans and finish cooling on the rack.

Filling: Mix ¼ cup sugar and cornstarch in a bowl until smooth.  Add egg yolks and mix until a paste is formed.  Stir in ½ cup milk.  Add to saucepan.  Combine remaining 1 ½ cups milk and ¼ cup sugar in the same saucepan and bring to a boil.  Pour hot mixture into a bowl, whisking constantly.  Pour back into saucepan.

Cook over medium heat, stirring constantly, until smooth and thick.  Remove from heat and stir an additional minute.  Stir in vanilla and transfer to a bowl.  Cover with buttered parchment paper touching top and chill a minimum of 2 hours or as long as 2 days.

Transfer the filling to a pastry bag fitted with a 3/8-inch plain tip. Insert the pastry tip 1/4-inch into the bottom of each cupcake and squeeze a little filling into each one.

Glaze: Place the chocolate in a small bowl. Whisk in the boiling water and blend until smooth. One at a time, dip the top of each cupcake into the warm glaze. Turn the glazed cupcakes right side up and set them on a wire rack on top of a baking sheet. Refrigerate the cupcakes for 5 minutes to set the glaze.

Icing: In a medium bowl, whisk the egg white until frothy. Stir in the cream of tartar. Gradually mix in enough of the confectioners' sugar to make a fairly stiff and smooth icing. Fill a small paper cone with the icing and cut a 1/16-inch opening at the tip. Remove the cupcakes from the refrigerator. Pipe a design (a squiggle, spiral, etc.) on the top of each cupcake. Let the design harden and then cover and refrigerate the cupcakes. Serve at room temperature.

The cupcakes can be made and refrigerated up to 2 days in advance, or frozen up to 2 weeks.

Makes 18 cupcakes.
* * * * 
Snowballs
Posted by Cookin'Mom at http://www.recipegoldmine.com 

4 egg whites
1/2 cup butter
1 cup granulated sugar
1/2 teaspoon vanilla extract
1/2 teaspoon almond extract
Rind of 1 lemon, finely grated
2 cups sifted cake flour
1 tablespoon baking powder
2/3 cup milk
2 to 3 cups sweetened shredded coconut

Frosting:
1 (16 ounce) package powdered sugar
1 (7 ounce) jar JET-PUFFED Marshmallow Creme
1/4 cup margarine or butter, softened
1 teaspoon vanilla extract
1 to 2 tablespoons milk

Heat the oven to 350 degrees F. Butter and flour muffin tins or dome shaped baking molds and set aside.

Whip the egg whites in a clean bowl until stiff but not dry and place in the refrigerator while you make the rest of the batter. Cream the butter and add the sugar. Continue mixing to blend well. Add the vanilla extract, almond extract and lemon rind and mix well.

Sift the flour 3 times with the baking powder then add it to the butter mixture alternately with the milk in 3 additions. Fold in the whites and pour the batter into the molds, filling about 3/4 of the way up. Bake for 20 to 25 minutes until batter is firm to the touch in the center. Let cool in the pans then turn out so the top becomes the bottom (you may need to trim them a bit so they sit flat).

Frosting: Beat sugar, Marshmallow Creme, margarine or butter and vanilla extract with electric mixer at medium speed, beating in milk as needed to desired frosting consistency.

Place the coconut in a bowl and add 1 drop of red or green food coloring for a pale color. Toss until food coloring is well mixed in and the coconut is the desired color. Fros
t the top and sides of the cakes and dip/roll in coconut to make them look like snowballs.

* * * *


For the Twinkies, Cheryl went to a site called Top Secret Recipes. There she found both the recipe (a low-fat version also is available) and instructions how to make the mold. Check it out!
http://www.topsecretrecipes.com/Hostess-Twinkie-Recipe.html.






Tuesday, December 27, 2011

Unconventional Chocolate Chip Cookies

The holidays are over and I’m tired of making red and green sugar cookies. I want a good old-fashioned chocolate chip cookie. And when I decide I want to bake, I just start baking. I grab Betty, my KitchenAid stand mixer, and head to the pantry to see if I have all the makings for a chocolate chip cookie. Flour, check. Baking soda, check. Sugar, both white and brown, check.  Looks like the making of a cookie. Except...oh no.  The last of the eggs were made this morning for breakfast.  What to do? What to do? Here comes the unconventional part—use mayonnaise.  Yep, that’s what I used. To substitute two eggs I used six tablespoons of mayonnaise.  After all, what is mayonnaise except eggs, right?  And oh yeah, instead of those whimpy chocolate chips, I use the melting chocolate chips. Yep, the big chocolate discs. Yum! One suggestion: Don't tell the cookie eaters that that the cookies are made mayonnaise instead of eggs until after they exclaim, “These are the best cookies ev-ah!" — Lisa


You'll need:
2 ¼ cups all-purpose flour
1 tsp. baking soda
1 tsp. salt
1 cup (2 sticks) softened butter
¾ cup white sugar
¾ cup packed brown sugar
1 tsp vanilla
6 tbsp. mayonnaise
3 cups melting chocolate discs

Preheat oven to 350 degrees. Combine the flour, baking soda, and salt is a small bowl and set aside.  Beat the butter, both sugars, and vanilla in mixer until creamy. Add mayonnaise.  Gradually beat in the flour mixture until combined. Mix in the chocolate. 

Drop by ice cream scoop onto a baking sheet.  These will be huge cookies!  If you want, sprinkle a little sea salt on each cookie; salty and sweet is a great combination. Cook 18-20 minutes on the middle rack.   Check cookies at 15 minutes to see if sides are browning.  Let cool. 

Remember...shhhhh...it's a secret!!

Sunday, December 18, 2011

Leave your passport at home and head to Eataly

I had heard mixed reviews from friends who had visited Eataly in New York City, so I was excited to check it out for myself. Evan and I met our friends Kathy and Ernie in Times Square and took the R train downtown. I was expecting to walk up from the subway and see something equivalent to the Magic Kingdom, but there it was, just another building with modest signage indicating that we had arrived at our destination.
But when we entered the market, I felt like I was a kid again in Disney World. Only it was Italy! There was a lot of "oohing and ahhing" going on as we walked down the aisle and marveled at the displays of products and eateries lined along the wall. Kathy and Ernie have been to Italy several times so there was a lot of reminiscing going on: "Remember this is the cheese we had in Parma?" and "This is the olive oil they had at that restaurant in Tuscany." Evan and I have never been so there was a lot, "This is amazing. We have to get to Italy" going on. (I think he got the hint.)

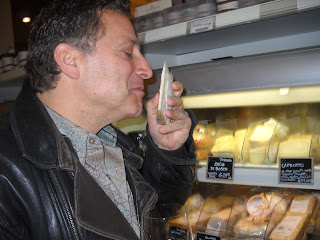
We walked around a few minutes checking out the pasta, produce, seafood, all so overwhelmingly fresh. We grabbed a glass of wine and watched the patrons at the marble top standing tables tables delighting in their cheese and fruit platters. We watched the "mozzarella artisans" make the fresh stuff, with whole milk only, right before our eyes.

Kathy and Ernie headed over to the wine pairing and enjoyed a glass of Asti Spumante with chunks of sharp parmigiana.
As soon as we arrived we headed straight to the reservation desk for Birreria to put our name down. They told us it would be about a half hour and they would send a text when our table was ready. They were right on target. We took our last sips of wine and headed up the elevator to the rooftop restaurant and brewery. We ate under the night sky, protected from the wind and cold by the retractable roof. It must be awesome when the weather is nice and the roof is down.


Our waiter Peter explained the menu's Italian/German influence and for beer suggested the Victory Prima Pils, a "snappy, peppery pilsner." Evan and Ernie were sold. Kathy and I stuck to wine and had a lovely red made with Sangiovese grapes. We ordered the marinated olives to start. It was a nice assortment and just the right amount for the four of us. Peter also brought us some wonderful bread and olive oil for dipping to start. For dinner we split three meals: the grilled portobello mushrooms with piquillo pepperonata and arugla; the costoletta di maiale con bomba (pork chop with fried fingerling potatoes, roasted onions and Calabrian "bomba" vinaigrette); and the stripped bass special with couscous. It was all delicious.

For dessert we headed back downstairs for cappuccino and gelato. But before we did, Peter took us behind the scenes to show us how the beer is brewed (see videos below).

We were lucky to grab a table downstairs across from the Gelateria and enjoyed some of the best gelato I've ever had. (I went for a scoop of chocolate and a scoop of coconut on a waffle cone. Yum!) I also stuck my spoon in everyone else's cups and tasted the hazelnut and espresso. Next visit I'm trying the pistachio, for which they get the nuts from Bronte, Sicily.

It's definitely worth a visit to Eataly. Yes, it's crowded; yes, you'll probably have to wait for a table at one of the many eateries; yes, the checkout lines are long. But go with all that in mind and no restrictions on your time, and you're sure to enjoy the experience. Go mangia!


(For more photos of Diana's trip to Eataly, go to www.facebook.com/cousinsinthekitchen.) 

Saturday, December 17, 2011

Deck the Halls!

Every December our parents would pile us in the back of my Uncle Mike's red station wagon along with our cousins, Lisa and Michelle, and we would drive around Alpine, NJ looking at all the beautiful christmas lights.  There was nothing like this!  This house is in Denville, Morris County, NJ.  If you're in the area this house is worth the stop!
How do you decorate for the holidays?  Do you go all out or throw a light or two around the house?  We'd love to see your holiday decorations!  It would feel like we were in the red station wagon again!  Send your photos to cousins@cousinsinthekitchen.net.

Wednesday, December 14, 2011

Buffalo Chicken Soup

Lisa always likes a good challenge. We don't know how this scenario played out, but we do know that when Eddie challenged Lisa to make a buffalo chicken soup...he went down!

"This came about when my friend Eddie challenged me to come up with a buffalo chicken soup that he saw on a menu at a Boston restaurant. He's a huge buffalo chicken fan but he couldn’t order the soup because he was there in the morning and apparently they frown upon serving the soup for breakfast. So being Italian and a Bucco, I took him up on the challenge and had great success!  It’s my shortcut version using my dad's vodka penne sauce as a base, and I usually have plenty of that in the freezer. Needless to say I won the challenge and now Eddie doesn't have to go to all the way to Boston for "wicked good" buffalo chicken soup." —Lisa

You'll Need: 
My Dad's Vodka Penne Sauce (recipe posted July 25, 2011)
2 or 3 boneless chicken breasts, boiled and shredded
½ cup celery, finely chopped
Frank's Red Hot Sauce to taste (yes, I put that #$&* on (almost) everything!)
Your favorite hot wing sauce to taste (I like Steve & Ed’s Garlic Buffalo Wing Sauce)
Blue cheese crumbles

Heat the vodka sauce. While sauce is heating, boil the chicken breasts. Let cool and shred with a fork.  Add to the sauce. Add celery, Frank's Red Hot and the hot wing sauce.  Cook until everything is heated through.  Divide into bowls and add blue cheese to each bowl.  Oh yeah, take that Eddie! 

Thursday, December 8, 2011

Beef Stew over Egg Noodles

My Rival Crock Pot is a lifesaver. With teaching full time, interning as a vice principal, graduate school work, twins, a husband and marathon training, my life is happily hectic, and I wouldn’t want it any other way. But that doesn’t mean I’m not always looking for ways to make some aspects of my life a little easier. That’s where my Crock Pot comes in, especially in the winter when my Crock Pot is my best friend. I chop all my veggies the night before, get a little help from ShopRite pre-chopped meat and McCormick's Stew Mix and BAm!...a slow-cooked dream. There is nothing like coming home and knowing that the evening meal is ready. All I have to do is boil the water for the egg noodles and serve. Less time in the kitchen and more time for my family! – Jennifer

What you'll need (feeds 4):
2.5 pounds beef cubes (buying pre-cubed makes this meal that much easier) 
1 6-oz can of tomato paste
2 tbsp olive oil
1 yellow onion, chopped
1 celery stalk, chopped
1 package baby carrots
1 package McCormick's Beef Stew Mix
1 package egg noodles. You can also serve this over brown rice 
1tbsp cornstarch for thickening
2 cups water
½ cup Merlot. Any red wine will do, but I love Merlot. And, it’s the perfect wine to have with the stew! 

I like to chop up the veggies the night before to make things easier. I like to rough chop the onions and celery. The next morning
 I put all but the egg noodles and cornstarch into the slow cooker. Cook on low for 8-10 hours, or on high for 4 hours. 

Boil water and cook egg noodles. Put cornstarch in about a ½ hour before serving to thicken the sauce. Serve stew over the egg noodles and enjoy! 

Eliza and Abigail love when mom makes a Crock Pot dinner because that means she spends less time in the kitchen and more time with them! 


Tuesday, December 6, 2011

Ginger Noodles with Bok Choy and Edamame


This is a recipe I came up with during my vegetarian years. (Ah yes, the vegetarian years...I remember them well!) This is a great meat-free, light dish that is super healthy and easy to make. Here's how it happened—I was looking for a pasta dish one day, but I didn't want to have that after-dinner heavy feeling. When you're a vegetarian it can be tricky to balance your diet; you don't want to eat carbs all the time, and you want to make sure to get enough protein. This was the key for me to maintain a healthy vegetarian lifestyle. I have tweaked this recipe over the years by switching to whole wheat spaghetti or sometimes I use garden veggie pasta noodles made with tomatoes, carrots and spinach, These options add extra protein to a meat-free dish, plus they're high in fiber so you'll get fuller faster. Sometimes I add grilled tofu strips with lemon grass. You can also use portobello mushrooms, which gives the dish a real "beefy" feel. If you must have meat you can always add grilled chicken or if you prefer fish, add shrimp. This is a great dish with an Asian flair that will have your friends coming back for seconds. —Jill

You'll need:
1 lb whole wheat spaghetti
1 lemon for juice and 1 tsp zest
1 tbsp low-sodium soy sauce
2 tbsp ginger paste (in the tube)
5 or 6 large white or portobello mushrooms, sliced
Scallions, chopped
Bok choy, chopped (if you're not crazy about bok choy, you can substitute spinach)
Edamame beans in shell (or sesame seeds)

Boil the pasta in a large pot of salted water.
While pasta is boiling (8-10 minutes; whole wheat pasta takes a little longer to cook), sauté mushrooms in a large skillet until tender. Add bok choy until the greens cook down. Add ginger paste and soy sauce.  Drain the noodles and add to the mushrooms and sauce. (If the sauce is too dry add 1/2 cup of the starchy pasta water). Top with scallions, lemon zest and a few salted edamame beans (or sesame seeds).
Add a squeeze of lemon juice on top and enjoy! 

Thursday, December 1, 2011

Pasta with Fresh Veggies

This is a dish my mother would often make for us because she knows her grandsons love it (it's pasta...'nuff said) and her picky son-in-law also enjoys it because of the array of fresh vegetables. It's been a while since Evan, both boys, and I have been at my mom's at the same time for a weeknight dinner (or "sup-pa," as she calls it). With the kids' schedule and Evan's traveling, we never seem to be there at once. But the recent October snowstorm left us without power for a few days so we bunked at my mom's one night and, lo and behold, this is what she made. It was, as always, delicious. And what's great about this dish is that you can change it up with a variety of vegetables, so it never gets boring. Not that it would make a difference to my kids...they would eat pasta the same way every night and never get bored (yes, that's the Italian in them). It was a nice night, despite the crazy storm, so thanks to both moms....mine and Mother Nature...for making it possible!Diana

What you'll need (to feed four; double for more!):
1 pound tricolor pasta (rotini, wheels, shells, whatever you prefer)
1 large red pepper, seeded and sliced in strips
1 large green pepper, seeded and sliced in strips
1 large zucchini, cut in chunks
1 large onion, sliced in strips
1 head of broccoli, steamed (or you can cheat and use frozen)
1 package of white cap mushrooms, cleaned and sliced
2 cloves garlic, sliced
1 small can chicken broth
1 small can (14.5 oz) of diced tomatoes
Parmigiana cheese
Olive oil
Seasoning

Coat the bottom of a large frying pan with olive oil. On medium heat sauté onions, garlic and peppers until soft. Add zucchini, mushrooms and broccoli, and sauté those until partially cooked, but not soft. Add chicken broth and diced tomatoes. Season with pepper, basil, (my mother loves using Mrs. Dash.)

Cook pasta. When done, combine the pasta and veggies in a large bowl. Mix and top with grated cheese. Mangia.

Tuesday, November 29, 2011

Creamy Pesto Shrimp Over Risotto


It was a week before Thanksgiving and I wanted to make room in my fridge and freezer for the turkey and other Thanksgiving items that would be moving in. I began to take inventory: I had pesto (I always keep a jar handy because I usually don’t have fresh basil around when I need it); I had frozen extra large shrimp in the freezer; I always have heavy cream in the fridge; and white wine...yeah, got that, too. OK, that should make some room! 

Put all those things together, make some risotto and I was in business. The sauce from the shrimp over the risotto is amazing. (Get yourself some nice, fresh Italian bread because you’ll definitely want to dunk. And the best part...there were no leftovers for the fridge!—Lisa

You'll need:
1.5 pounds extra large shrimp, boiled until pink then drained
1 cup pesto (from a jar or fresh)
1/3 cup white wine
1/3 cup heavy cream
2 cloves garlic, chopped

In a large fry pan, sauté the garlic. Add the shrimp, pesto, white wine and heavy cream Mix together thoroughly and simmer on stove until just bubbly and sauce thickens a little (shrimp should be completely curled up)

Serve over risotto. Done!


Wednesday, November 23, 2011

Thanksgiving Memories...

Lisa, Diana, Jennifer and Jill take time out from sharing recipes to share their thoughts on Thanksgiving and the holiday season. Cousins in the Kitchen wish everyone a wonderful Thanksgiving. Bon Appétit!

Lisa: Hanging the decorations that looked like they were made of popcorn, my father securing the Santa sleigh with four reindeer onto the roof so it looked like they were flying, and adorning our silver Christmas tree with the red, blue and green rotating lights shining upon it—these are a few memories of my childhood holidays. All the decorations went up right after Thanksgiving. I always got this great feeling around the holidays. Almost like everything was just perfect. I think  Diana, Jimmy, and I may have even got through a dinner without throwing the peas at each other...or that may just be my imagination!

I still begin decorating for Christmas the day after Thanksgiving. I think it's because I want that feeling to last as long as possible. So the day after Thanksgiving my four kids, now grown, know to come to the house to help decorate the tree. They know it's tradition, even though they say that I re-arrange the ornaments every year. It must be habit since I did that when they were small because only the bottom half of the tree got adorned by their tiny hands.  

This year, however, will be a little different. We are going through an unplanned remodel due to Hurricane Irene. My house is a total mess with everything that was salvageable from downstairs, now upstairs. It doesn't look like I'll be decorating on Black Friday this year. My husband, knowing how badly I want to do that, is working frantically to get the house back in order, but I just have to face the fact that the tree may not go up, the lights may not go on, and the wreath may not get hung on November 25. I still, however, have that wonderful feeling about the holidays that I do every year. We have a new granddaughter who will celebrate her first Christmas and first birthday in December; we have two new babies from my cousins in Tennessee; my grandmother will turn 92 years young Nov. 27  and I will celebrate my 29th wedding anniversary with my husband Arnold a week before Christmas! 

The decorations will eventually go up but I realize I don't need them in order to have that wonderful holiday feeling. It's almost like a Charlie Brown Christmas moment! I have a lot to be thankful for and to celebrate. Happy Thanksgiving, Merry Christmas and Happy New Year!       

(Pictured: Last year Lisa was so excited about the pre-lit tree she ordered that she didn't even wait until the day after Thanksgiving to begin decorating for Christmas. As soon as the Thanksgiving dishes were cleared, she and her son Arnold got to it. Sadly, the tree did not meet Lisa's expectations and was taken apart and shipped back the next day!)


* * * *
Jennifer: On the way home from school this week my daughter Eliza said, “Mommy, I’m thankful that you and daddy took us to see the Rockettes.” Abigail then chimed in and said, “I’m thankful that you are a good mommy.” Of course I cried. Yes, it’s that time of year when we hug our loved ones a little tighter, laugh a little harder as the wine flows, and smile through our tears as we think of all the things we are thankful for this holiday season.
 
Thanksgiving is a wonderful holiday, not just because of the food, but also because it gently reminds us how blessed we truly are. Granted, the food is pretty spectacular, especially an Italian Thanksgiving, which uses the turkey more as a centerpiece than a main course. But it’s the people who make the memories, not the food. Whether it’s the funny family stories told at the table, or the children running around the house giggling with delight, Thanksgiving provides families with the future memories that they will cherish.My fondest memories of childhood come from Thanksgiving with my cousins Jill and Adam. We would prep all afternoon in the basement for our ‘show’ that we would put on after dinner. It was a win/win situation for everyone. Our parents got to hangout, share the ‘spirits’ (wine) without the children in their hair, and we got to play and fantasize about being famous. That memory seems like a lifetime ago and yesterday all at the same time.

Thanksgiving is the official start to the holiday season.  While many are making their shopping lists and complaining about all they have to do, Thanksgiving should remind us of all the wonderful memories we have and all that we have to look forward to.


* * * *

Jill: Ahhh...the week before Thanksgiving, probably the most under rated week of all holidays. I call it the prep week. The week where the grocery stores wish they hired more people. The week we rush around with our lists and our carts, up one aisle and down another as if there was a total food shortage. I've never seen so many frantic people rush around so fast.  


This is why I dislike shopping for Thanksgiving. The good news is that my job on the radio allows me to shop at odd hours. Since I wake up at 4 a.m. to do the morning show, I have the super power of not being tired at an early hour,  making me unstoppable at 5 a.m. on a Saturday. I know it's not easy to shop at that hour, but if you can do it on Black Friday then you can do it a week prior to ease your mind and shopping experience. 

Another way I get a jump on things (and some may not believe in this method) is my husband and I put up our Christmas decorations the weekend before Thanksgiving. I realize this is taboo, to which I reply, "I do not care." This tradition started last year when I was hella-pregnant and had a due date freakishly close to Christmas. My husband and I decided this would be easier so we could be totally focused on baby instead of decorations. We loved having that extra time with the decorations and let's face it, it doesn't make the Thanksgiving turkey taste any less delicious.  

Elliot and Autumn are new additions to the table this Thanksgiving.

The week is now upon us where the food is purchased, the wine is chilling, and the table is set. I have my list of things to pack for the family so we can spend the night at my parents' house and wake up to the smell of the turkey and sound of the Macy's Thanksgiving Day Parade on TV. Only this year, I'm a mom! Not only will there be a new baby boy at the table this year, but also a baby girl—my niece Autumn. My dad will have a baby in a highchair to his left and to his right, which is all he's been talking about since last Thanksgiving. No matter where you sit or what you eat or how you decorate, I hope your holiday is filled with love, happiness and many traditions...new and old.

* * * *

Diana: I’m fessing up…mainly because I know somehow, someday word will eventually get out that the year I hosted my first Thanksgiving I forgot to remove the paper-wrapped giblets from inside the turkey before putting it in the oven. My bad. But at the first sign of smoke I quickly made the save and no one was the wiser. Of course, my husband couldn’t let this go without telling the entire family about my slight mishap. “Guess what Diana did?!” I recall was his greeting at the front door, and I spent the rest of the day being roasted more than Tom the Turkey. 

But there was something so exciting about hosting that first Thanksgiving. We had just purchased our first home, I was pregnant with our first child, and all was right with the world. (Although I’m sure the turkey thought otherwise.) Since then, I have hosted several Thanksgivings—usually due to defeat against Lisa at our very thoughtful and sophisticated method of deciding who gets to host, Rock, Paper, Scissors. But it is always that first time that comes to mind when reminiscing about past Thanksgivings. After years of watching my mother prepare for Thanksgiving, then having it go to my sister, I had finally  become part of the rotation. I had arrived! 

 
To me, what makes Thanksgiving so great is that no matter who hosts it, everyone brings something to the table…literally. The conversations weeks ahead to decide who’s bringing what; the kids advocating for their favorite dishes; making sure the desserts include something for everyone—it’s family collaboration at its best. Thanksgiving is probably the biggest meal of the year, yet it comes together seamlessly because everyone works together for the common good—eating, laughing, sharing and being together. And to me, that truly marks the start of the holiday season!


Diana's husband Evan with their very first Thanksgiving turkey (minus the giblets!)


Friday, November 18, 2011

Olio D'Oliva arrives from Italy!


When Lisa and Diana's father, Jimmy, passed in August 2010, Jill's parents Butch and Rita celebrated his life by adopting an olive tree in Italy. The first shipment of the oil made from the tree arrived at Lisa's house this week! It included three types of oil: one made with chillies, one made with mandarins and another made with lemons. 

The "hot" oil is infused with Sicilian chillies for three weeks. The folks at Nudo Grove say this is just long enough for the chili flavor to assert itself, but not so long that it takes over. The can says, "The end result is like a Sicilian donkey: a soft nose at the front and a cheeky kick at the back." Say what?! They say it's great drizzled over pasta dishes, pizza, red meats and eggs. Yum! 

The oil with mandarins is ideal on salads, smoked meats and citrusy cakes. It's made with fresh mandarins from Southern Italy, which are "hustled straight off the tree into our olive press." Cool! 

The lemon oil, they say, is perfect on salads, white meats and fish. Within hours of being picked, the Sicilian lemons are driven "at breakneck speed" to the press where they are stone-milled together with the olives. Nudo uses late-harvest olives with a subtler flavor to allow the lemons "to burst through for their moment in the spotlight." Lemony good! 

We can't wait to try each of these oils and let you know how they are. We have a feeling each one will be fabulous. 

Thanks Aunt Rita and Uncle Butch...We love you! —Lisa and Diana 

P.S. If you want to learn more about adopting a tree, go to www.nudio-italia.com


Thursday, November 17, 2011

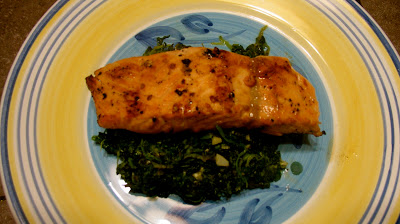
Grilled Salmon over Sauteed Spinach

This recipe was perfected when my husband and I were dating. I never ate salmon growing up so I didn’t know how to cook it or how to serve it. One Sunday, Jared and I decided we were going to try to replicate a salmon dish we had at a restaurant. After a couple of attempts, I got the marinade and Jared got the grilling down to perfection. Now every time I eat this dish, I think of us, young and in love. This one’s for you babe..Love you!Jennifer


What you’ll need:
6 oz. salmon fillets with skin on
1/3 cup sesame oil
1/2 cup extra virgin olive oil plus more for pan
4 cloves of garlic, 2 finely chopped; 2 coarsely chopped
1/2 tsp brown sugar
Spinach
1/2 tsp salt
1/2 tsp pepper
1/3 cup feta cheese crumbles

To make the marinade, mix together the sesame oil, olive oil, finely chopped garlic, brown sugar, salt and pepper. Pour over the salmon fillets and let marinade for about 30 minutes before grilling.  (I like to make extra marinade and use it as a dipping sauce.)

Sautée the spinach. (You can do it this way or use Lisa's spinach recipe from last week).
Place fresh, clean spinach in skillet
Twice around the pan with EVOO
Add the coarsely chopped garlic and a pinch of salt. 
Cover spinach and let it cook. At the end, add the feta cheese

Grill the salmon skin side down first.  We love to grill all year round, so we use our outdoor grill every time we make this dish. Grill each side for about 4 minutes. Peel skin off the salmon before placing on over the spinach to serve. Enjoy!

Tuesday, November 15, 2011

Panzanella Salad (Italian Bread Salad)

This is a no-cook recipe I have seen made a thousand ways. It's fresh, it's healthy, it's AMAZING. It got my attention immediately when I saw that bread was involved. I could never ever eat low carb. I'm convinced that there has to be a high-carb diet out there that works. Trust me, if it's out there I'll find it. For the nine years I was a vegetarian, I tried all kinds of vegetable recipes I thought I'd enjoy. This salad can be made with leftover veggies in your fridge or any cold, crisp vegetable that is in season. I've seen it made with capers, roasted red peppers, bell peppers and more. Use your imagination and let your appetite lead the way! My version includes seven simple ingredients.— Jill

You'll Need: 
Tomato
Cucumber
Red onion
Bread (can be day old bread) Ciabatta, whole grain, or any other crusty bread. This is a great way to not only use up veggies in the fridge, but to also use up leftover bread of all kinds.
Olive oil
Red wine vinegar
1 tbsp Oregano
Cube the bread, red onion, cucumber, and tomato into large bite-sized pieces and place into a large bowl. Add a generous amount of the oil and vinegar. (I use red wine vinegar, but balsamic is also good if you want to use a mixture.) 
Add the oregano, toss and eat. This is great as a side dish, or as a light lunch. 
Add tuna, chicken, or shrimp for a more hardy meal.


Thursday, November 10, 2011

Sauteed Spinach with Goat Cheese and Pignoli Nuts

 This is an easy side dish (or main dish—the way I like it!).  Spinach was never my kids' favorite, which I think is the case with most kids. The only way I could get them to eat spinach when they were younger was to buy the canned spinach with Popeye on it. I would have to show them the can, and have them watch me open it and put it in the pot. I guess they figured if Popeye could eat it, then they could, too!  Today my son Jimmy loves this more grown-up version of spinach. He would eat the whole dish...and has...if I let him. —Lisa 


You'll need:
18 oz fresh spinach
3 cloves fresh garlic, sliced thin
2 ½ turns of the pan of extra virgin olive oil
¼ cup pignoli (pine) nuts
Generous handful of crumbled goat cheese

In a large, deep pan sautée the garlic in the oil on low heat for 1-2 minutes. Be careful not to burn the garlic. Add the spinach (it looks like a lot but it shrinks down to nothing.) Toss the spinach, cover, and turn the heat off.

With the heat off, toss every now and again until the spinach is wilted almost all the way. Add goat cheese and cover.

Meanwhile, toast the Pignoli nuts on low heat and only until you can smell that woodsy aroma of the nut. Be careful not to burn them.

Right before serving, toss the spinach again and add the nuts.
The cheese will be slightly melted and adding the pignoli nuts gives the spinach just a little crunch. Add some grilled chicken or sausage and this side dish becomes a meal in itself. Take that Popeye!

Tuesday, November 8, 2011

Banana Bread with Walnuts & Chocolate Chips

My husband and I met Lisa and Glenn Leibel in the beginning of the summer of 1991. They had just married in March, and Evan and I were engaged to get married that October. I can remember when we sat down to do our wedding invitations later that summer, we debated on inviting them to the wedding. We had known them only a few months, but felt a strong connection to our new friends. We decided to invite them, and the four of us have been an integral part of each others’ lives ever since—through the births of our children, the deaths of three of our fathers, career changes, new homes, and the list goes on. Our families have vacationed together, spent holidays together, and are there for each other for life’s celebrations and heartaches. These are friends that are not like family; they ARE family. You know what I mean; we all have these special people in our lives. 

Now that the kids are grown, we found ourselves out to dinner recently, just the four of us. As we all put on our reading glasses to look at the menu, we realized that 20 years has gone by in the blink in the eye. We sipped our wine and toasted to 20 years of marriage and friendship, then spent the rest of the night enjoying a hardy meal and hardy laughs. —Diana

* * * *

On this recent visit Lisa brought her incredible banana bread. It's so delicious, you may not want to share.

You'll need:
1 stick of butter (1/2 cup), melted
1 cup sugar
2 eggs, slightly beaten
2 medium-size bananas, mashed
1/2 tsp salt
1 tsp baking soda
1 cup flour
1/3 cup hot water
1/2 cup chopped walnuts (optional)
1/2 cup chocolate chips (optional)

Preheat oven to 350 degrees. 

Blend the sugar and butter. Mix in eggs and bananas and blend until smooth. Add salt and baking soda. Mix together. Add flour and hot water, alternating each ingredient. Stir in nuts and chocolate chips (if desired). 

Pour into greased 9-by-5 loaf pan and bake for one hour. Grab a big glass of cold milk and enjoy!

Wednesday, November 2, 2011

French Toast Cupcakes with Maple Syrup Frosting and Bacon

Who says you can't have cupcakes for breakfast? This recipe comes from Cousins in the Kitchen fan Lisa Stanley from Memphis, Tenn. who writes: "It was hard not to eat one of these for breakfast this morning. Who am I kidding? It was hard not to eat all six. I found this recipe and made some slight adjustments. Enjoy!" 


Thanks Lisa for satisfying our sweet tooth first thing in the morning. Love it! 


For the cupcakes you'll need:
3/4 cup (1 1/2 sticks) unsalted butter at room temperature
1 cup sugar
1 1/2 cups cake flour
1 1/2 tsps baking powder
1/4 tsp salt
1/2 + 2 tbsp cup milk
1 ½ tsps vanilla
1 tsp ground nutmeg
1 tsp cinnamon
3 large eggs, separated
6-8 slices bacon, cooked crisp and crumbled

For the maple buttercream frosting you'll need:
1 cup (2 sticks) unsalted butter at room temperature 
2 3/4 cups confectioners’ sugar
2 1/2 tsps heavy cream, at room temperature
3/4 tsp maple extract 

Preheat oven to 375 degrees. Line a muffin pan with paper cupcake liners. With an electric mixer, mix the butter and sugar on high speed until light and fluffy, about 10 minutes. Meanwhile, in a medium bowl, whisk together the flour, baking powder, salt, nutmeg, and cinnamon; set aside. In a small bowl, whisk together the milk and vanilla and set aside. Add the egg yolks to the creamed butter one at time, waiting for each one to be fully incorporated before adding the next. Alternately, add the flour mixture in 3 additions and the milk in 2 additions, waiting for each to be fully incorporated before adding the next. Raise the speed to medium and mix briefly until a smooth batter is formed. 

Transfer the batter to a large bowl. Thoroughly clean the bowl of the mixer and put the egg whites inside. Whip the egg whites on high speed, using the whisk attachment, until stiff peaks are formed. Working in 3 batches, using a rubber spatula, fold the egg whites into the batter, until just incorporated. Divide the batter evenly among the cups in the muffin pan. Bake until golden brown and a toothpick inserted in the center of the cakes comes out clean, 25-30 minutes. Cool completely before frosting.

To make the frosting, mix the butter and sugar on low speed until incorporated. Increase the speed to high, and mix until light and fluffy, about 5 minutes. Reduce the speed of the mixer to low. Add the heavy cream and maple extract. Beat until fluffy and well blended. May be stored in the refrigerator for 3 days.

Frost cupcakes and then add the crispy bacon...yes, bacon! 

Monday, October 31, 2011

Roasted Pumpkin Seeds


Happy Halloween, everyone! The cousins love roasted pumpkin seeds, and what better day than Halloween to share some roasting techniques and stories. Today you'll find out how  Jill first began roasting pumpkin seeds, and a read a little story from Lisa and Diana about their pumpkin carving experience growing up.


Jill: 
One of my best friends is an amazing baker. I, on the other hand, have never claimed to be a good baker. As you know, I'm more of a "little of this; little of that" kind of gal. My best friend Jo, an Italian gal from Staten Island, came over one day to bake. "Where are your measuring cups?" she asked. My answer was something along the lines of "Um, I think I have one, and it's in the dog food bin." Needless to say she was mortified! The very next holiday guess what I got from Jo? Measuring cups! And Jo encouraged me to "start small." I thought, OK, pumpkin seeds aren't really baking, but if I could master roasting pumpkin seeds, I may be well on my way to bigger baking adventures like pumpkin bread and pumpkin pie! So check out my roasted pumpkin seeds, which I think I have mastered if I must say so myself!
Jill and her friend Jo eating something
finger-licking good! 


Carve one pumpkin like you would as if you were making a Jack O' Lantern. Scoop out the seeds with a big spoon, then rinse the seeds until they are clean. Place seeds on a baking sheet with olive oil, salt and one teaspoon sage. Roast at 375 degrees for 15 to 20 minutes until golden brown. When you take them out of the oven, sprinkle with just a little more salt. I also top with parmesan cheese. Happy Halloween!


Lisa and Diana:
When we were small, one of the best parts about Halloween, besides scoring some major amounts of Mounds bars, was getting to carve the pumpkin and roasting the seeds. Our mother would cover the kitchen table with old newspapers and place the big pumpkin in the center for us and our brother to adore. We rolled up our sleeves while our mother cut a perfect circle around the top of Mr. Jack O' Lantern. 


As soon as she grabbed the stem and wiggled the top off just so, we got to dig in and get our hands full of the wet, mushy pumpkin pulp and seeds. We still love the smell of the inside of a freshly cut pumpkin. The three of us would pull as much out as fast as we could and then, at warp speed, pick out the seeds from the orange strings. And when all was said and done, whichever one of us had the most seeds in their pile was the winner. 


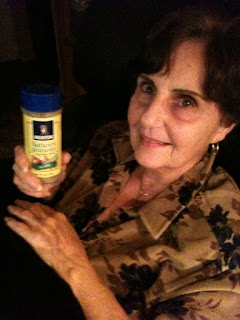
Lisa and Diana's mom Pat with her secret
roasted pumpkin seed ingredient, Nature's 
Seasoning. 
While was one of us was claiming victory over the other two, mom put all the seeds in a white plastic colander (which we think she still owns), rinse them to remove whatever pulp we left behind, and pat them dry. She then placed them in a single layer on a cookie sheet, sprinkled them with Morton Nature's Seasoning, and put them in the oven preheated to 350 degrees.


When they were just starting to brown, she would move them around with a spatula ever so gently, flipping them over like a pro. The three of us stood around the oven, watching in awe as the seeds we had just pulled from their mother ship were turning into a delicacy we couldn't wait to eat. When they were dried out and golden brown on all sides, they were done!  She'd empty them into a huge bowl and the three of us would sit around it on the living room floor enjoying the seeds of our labor. Mom would say, "Don't eat them all; you'll get a stomach ache." We didn't listen. We'd eat every last seed. And the next day, our stomachs paid for it. And of course we heard, "I told you so!"